Skip to content
Search for:
BEAUTY
FASHION
TRAVEL
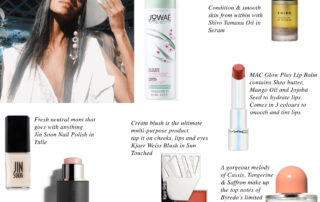
SPRING HAS SPRUNG
2021-08-24T21:49:01-07:00
By
leah
|
Beauty
|
Read More
SHINE BRIGHT
2021-02-17T22:29:30-08:00
By
leah
|
Beauty
|
Read More
Page load link
Go to Top